Let everything you say be good and helpful, so that your words may be encouragement to them. Ephesians 4:29b
Showing posts with label office furniture. Show all posts

Monday, September 10, 2012

The Dismal Before, Spectacular After Contest

Ok, I just had to share!  A few days before starting the Lost in Creative Space blog series, I took some more photos of my finished space.  As I looked through the pics, I remembered that I wanted to post my furniture pics to Rust-Oleum's Cabinet Transformations photo gallery.  Initially, the product hadn't really been used on furniture, so I wanted to share my results on a laminate wood office suite.  (Since then, they've come out with Furniture Transformations, but alas...)  When I landed at Rustoleum.com, the homepage was highlighting a contest -the "Dismal Before, Spectacular After Contest" sponsored by Rust-Oleum and HGTV for makeovers their products.  I clicked through a few of the entries and decided, "Hey, why not?  I've got the photos ready!"  So I submitted these:


One month passes...I had totally forgotten everything about it.  August 14th - during "Throne" week:  I see a missed call, a voicemail notice and this email on my phone:


Are you kidding me??!!  Is this for real??  I won??  I WON!!  This was such awesome news, I didn't know what to do with myself!! :)  I immediately responded via email with all the appropriate information.


Well, I guess it must be "for real" because look what the FedEx man just brought me!!


{SQUEAL!!!}

Well, I guess it's a good thing I decided to enter!  This pays back almost 90% of what I spent at Home Depot on the room!  Sweet!  On to my next project, right? :)

I just had to share that awesome news after finishing the series - coincidental?  Perhaps, but I think there might be more to it than that. :) 

If you have not seen the series, feel free to check out the following posts. 

Lost In Creative Space
Part I - Office Furniture Revamp 
(office furniture updated with Rust-Oleum's Cabinet Transformations!)
Part II - Green With Envy (wall color)
Part III - Order with Pop (organization of the space)
Part IV - "Throne" Away (trash to treasure office chair)
Part V - Finishing Touches (decor and accents)
Part VI - The Final Reveal (before and after shots)

As exciting as winning a prize is (and I never win prizes), there is an eternal prize that I must keep my eyes on...

Not that I have already obtained all this, or have already been made perfect, but I press on to take hold of that which Christ Jesus took hold of me. Brothers, I do not consider myself yet to have taken hold of it. But one thing I do: Forgetting what is behind and straining toward what is ahead, I press on toward the goal to win the prize for which God has called me Heavenward in Christ Jesus. 
- Philippians 3:12-14

And once again, thanks for visiting! 

Keeping Him in mind,


Monday, August 13, 2012

Lost in Creative Space: Part IV - "Throne" Away

I've been excited to share this particular post with you since my series began! You can catch up by checking out Part I, II & III.  Today's post is about a spontaneous addition to my creative space that came out of nowhere! :)  It all started on the curb....

Yes, you heard right - the curb.  If this thought bothers you, you may not wish to read on. ;)  I was driving my son to school one dreary morning after it began to rain.  I noticed that a neighbor around the bend from me (who I don't know personally, but a close friend does) had put something on the curb on trash day. This something made me slow down and look closer as I passed.  Being the daughter of a mother who is a collector, finder, redo-er and seller of "special things" (for a better term), I have never once taken anyone's "trash" in order to make it "treasure."  However, on my way back home, I realized why I slowed down in the first place.  I stopped, opened the back of my SUV and heaved THIS into the back of it. 


One large, heavy, navy blue chenille chair....someone's trash.  I know, crazy, but I somehow looked past that part and saw potential.  Mom's "special" genes must be seeping in! ;)  I liked the chair's shape and wooden detailing.  I did find a busted spring, but I still deemed it makeover-worthy.  You see, a few days prior, I was exploring the wonderful world of Pinterest.  I came across this pin and read the how-to.  Because of this, that chair grabbed me....so I grabbed it. :)


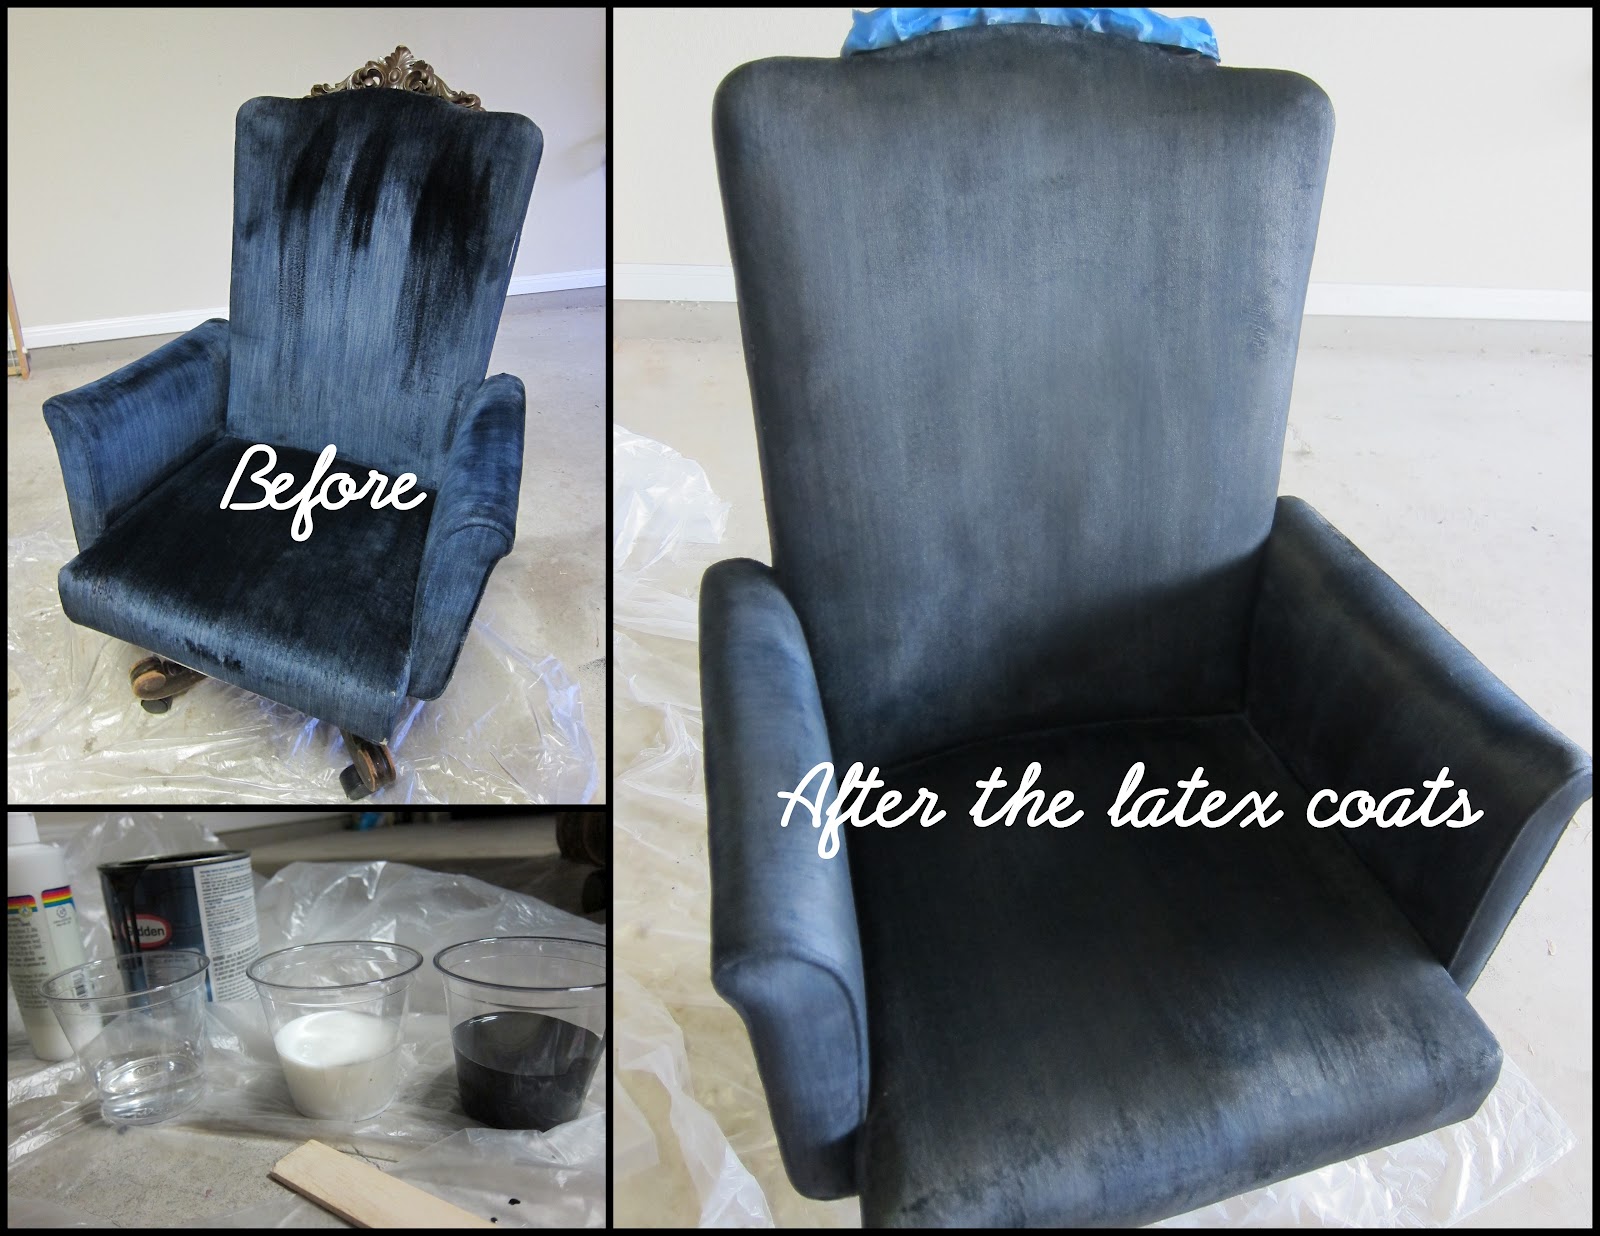
The pin is from Hyphen Interiors by Kristy Swain and the popularity of the post has since greatly increased!  It's an easy tutorial on brush painting paint+medium  onto upholstered fabric.  All I needed were latex and acrylic paint, textile medium, a spray bottle, a paintbrush and a little sandpaper. 

I let the chair dry and air out a few days outside.  Then I attacked it with Lysol, upholstery/carpet cleaner and a vacuum.  Disinfecting it in addition to the painting process would rid the "old and used" and make it new again.  Once clean and dry, I began the process....

I followed every step in Kristy's tutorial.  I chose black paint.  I considered other colors (green, pink and even cream), but with the dark blue fabric, I thought black would be a safer, easier color transition that would better hide dirt, wear or flaws.  The first coats (2) latex+medium+water coats were the primer coat, creating a thin stain look on the fabric.  A little buffing with the sandpaper helped soften the arms other areas after each coat dried.  The coat of acrylic+medium+water transformed the chair from blue to black.  Once complete, the fabric's texture was now more of a soft canvas, versus its former chenille.

The wooden details came next. Below are close-ups of them beforehand.  I replaced the old brass casters and with larger modern black ones ($4.99/pair at Home Depot), for a better roll on my chair mat, rather than sinking into it.  As for the wood, it certainly needed some love.


And love was added.  Spray paint works wonders.  It's a totally new chair! 


And to go even further, I tried something for the first time. I'm in LOVE.


 Cue Angelic Voices! 
How do you like my new throne? :)


 Requisite Before and After photo:


I am completely in love with the look of my new and improved upcycled chair!  The only downside is the the broken spring that I have resolved by adding a thick pillow cushion so I don't even notice it. :) And now...

Curbside Treasure Meets Creative Space!


Spiritually, when I think of making the old new, I am instantly reminded of the gracious blessing of being made new in Christ.  And He is still making me new today.

"Therefore, if anyone is in Christ, he is a new creation; the old has gone the new has come!"  2nd Corinthians 5:17   

Does anyone love the song Beautiful Things by Gungor as much as I do?  I'll confess that I've listened to this song multiple times in a row on multiple occasions. :) It's very relevant here.  It's beautiful and powerful (with strings!) and the "You make me new" bridge is my favorite part!  Spiritual or not, I encourage you to click to listen.


Thanks for visiting!


Keeping Him in mind,


Monday, July 23, 2012

Lost In Creative Space: Part I - Office Furniture Revamp

Howdy and welcome to my first-ever blog series!  I'm very excited to share my creative space project with each of you.  It involved multiple phases, so I thought a series would be the best way to show you the process.  There's no way I could fit it all in one post and I'd also like to keep my readers awake, so here goes nothing!  :)  My first mission? Furniture!

When we moved into our new home, all we had for our new front-of-the-house study was my sad, particle board corner desk.  We knew we needed actual office furniture to facilitate me working from home, hubby's after-hours work, his engineering stuff and all our books.  Since the new office suites were too pricey, we turned to Craigslist.   I loved the idea of a black set.  Plus, it would go with my already-purchased black Ikea Vallvik shelves!  Sadly, there was nothing worthy out there in black. :(  In the end, we settled for a cherry wood-colored  Sauder Hill set from a nearby neighborhood.

Yes, it's engineered wood with a laminate finish, so not a great color or quality, but it was a step up for us and it did the job.


My biggest dislike?  The brass...the gold brass had to go!  It was nice to have "new" furniture, but it was overly traditional and executive office-y for me.  Below is the opposite wall of Ikea shelves. At least they coordinated with the black desktop? :-/


Fast forward one year...

Sharing the office wasn't working out too well and I had pretty much taken it over for work and most things Clearly Candace. ;)  Then my hubby came up with a brilliant idea!  He discovered that one of our attics was actually large enough for a  lab+workspace for him and all his engineering needs!  What?  An unseen, designated place for all those electronics books and beautiful engineering devices?  Um..yes, please!  What?  I can create my very own space in the study?!  Hubby, you rock my world! {squeal!}
On to the first project:  Furniture Revamp!

Around that time, a high school friend and blog inspiration of mine, Lindsay of Living with Lindsay, tested a new product called Rustoleum Cabinet Transformations at a convention. It claimed to be the new answer for outdated kitchen cabinets and Lindsay, who updates woods and furniture regularly, was very impressed.  I read up on it and found that it could be used on laminated finish - SOLD.  I had the answer to my furniture problems.  I would create the black office suite I'd always wanted by transforming my cherry laminate finish to a black wood grain finish!  $80 later, I had this:


The Rustoleum steps intrigued me.  It only required deglossing (vs. sanding), a base coat, a top coat and a glaze. I passed on glazing, so I only had 3 steps!  After removing the hardware, doors and drawer fronts, I deglossed the doors/drawers in my garage and the furniture pieces inside the room.  This step required rubber gloves, a scratchy sponge (included) and the deglosser liquid (included). It basically just removed the sheen from the finish.

Prep and Deglossing


The color coats (2) and clear coat were painted using a 2" brush to create a wood grain texture.  Thankfully, I was able to save paint by not painting door backs and inner closed cabinets.  In addition, Pinterest gave me the awesome idea of a fabric-backed bookcase which resulted in even less painting area!  I got fabric (Joann's) and Tacky Spray, removed the backboard, carefully spray-glued the fabric to it-smoothing it flat, trimmed the edges, and reattached the backboard.  Wa-la!  I also purchased a 10-pack of satin nickel finish pulls for the desk and 6 matching oval pulls for the doors (Home Depot). No. More. Brass.  Putting it all back together was my favorite part!


Painting and Fabric Backing
I recently took more shots of the finished pieces, but please accept my apologies for not including the upper shelving.  I wanted to share the color/finish transformation without giving away the rest of the room! :)  I promise to add some full furniture shots to this post after my series is complete. Needless to say, I am still in love with this set and very proud of my this affordable DIY update!


Rustoleum Cabinet Transformation Results


Another bonus about the color choice was that my handy black Ikea shelves now look perfect in the room. :) Oh, and I decided to add another little dandy to the room using the same paint.  A little hint: it's not used for CDs anymore...


I hope you like the outcome as much as I do!  I highly recommend trying Rustoleum Cabinet Transformations if you have similar furniture or cabinets in your home to update.  It's a great product and worth the price in comparison to new furniture or cabinet replacement. 

Stay tuned for Part II of Lost in Creative Space!  Can you say walls? :) Any guesses on color?

Since today was a "transformation" day, I chose to leave you with one of my favorite verses from Romans on life impacting transformation...


"Do not conform any longer to the pattern of this world, but be transformed by the renewing of your mind. Then you will be able to test what Gods will is-his good, pleasing and perfect will."  Romans 12:2


Keeping Him in mind,