When we moved into our new home, all we had for our new front-of-the-house study was my sad, particle board corner desk. We knew we needed actual office furniture to facilitate me working from home, hubby's after-hours work, his engineering stuff and all our books. Since the new office suites were too pricey, we turned to Craigslist. I loved the idea of a black set. Plus, it would go with my already-purchased black Ikea Vallvik shelves! Sadly, there was nothing worthy out there in black. :( In the end, we settled for a cherry wood-colored Sauder Hill set from a nearby neighborhood.
Yes, it's engineered wood with a laminate finish, so not a great color or quality, but it was a step up for us and it did the job.
My biggest dislike? The brass...the gold brass had to go! It was nice to have "new" furniture, but it was overly traditional and executive office-y for me. Below is the opposite wall of Ikea shelves. At least they coordinated with the black desktop? :-/
Fast forward one year...
Sharing the office wasn't working out too well and I had pretty much taken it over for work and most things Clearly Candace. ;) Then my hubby came up with a brilliant idea! He discovered that one of our attics was actually large enough for a lab+workspace for him and all his engineering needs! What? An unseen, designated place for all those electronics books and beautiful engineering devices? Um..yes, please! What? I can create my very own space in the study?! Hubby, you rock my world! {squeal!}
On to the first project: Furniture Revamp!
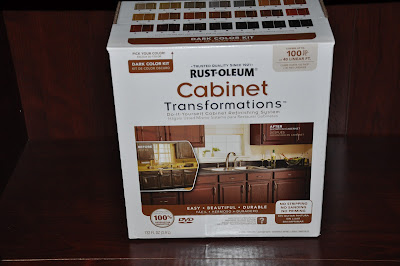
Around that time, a high school friend and blog inspiration of mine, Lindsay of Living with Lindsay, tested a new product called Rustoleum Cabinet Transformations at a convention. It claimed to be the new answer for outdated kitchen cabinets and Lindsay, who updates woods and furniture regularly, was very impressed. I read up on it and found that it could be used on laminated finish - SOLD. I had the answer to my furniture problems. I would create the black office suite I'd always wanted by transforming my cherry laminate finish to a black wood grain finish! $80 later, I had this:
The Rustoleum steps intrigued me. It only required deglossing (vs. sanding), a base coat, a top coat and a glaze. I passed on glazing, so I only had 3 steps! After removing the hardware, doors and drawer fronts, I deglossed the doors/drawers in my garage and the furniture pieces inside the room. This step required rubber gloves, a scratchy sponge (included) and the deglosser liquid (included). It basically just removed the sheen from the finish.
Prep and Deglossing
The color coats (2) and clear coat were painted using a 2" brush to create a wood grain texture. Thankfully, I was able to save paint by not painting door backs and inner closed cabinets. In addition, Pinterest gave me the awesome idea of a fabric-backed bookcase which resulted in even less painting area! I got fabric (Joann's) and Tacky Spray, removed the backboard, carefully spray-glued the fabric to it-smoothing it flat, trimmed the edges, and reattached the backboard. Wa-la! I also purchased a 10-pack of satin nickel finish pulls for the desk and 6 matching oval pulls for the doors (Home Depot). No. More. Brass. Putting it all back together was my favorite part!
Painting and Fabric Backing
I recently took more shots of the finished pieces, but please accept my apologies for not including the upper shelving. I wanted to share the color/finish transformation without giving away the rest of the room! :) I promise to add some full furniture shots to this post after my series is complete. Needless to say, I am still in love with this set and very proud of my this affordable DIY update!
Rustoleum Cabinet Transformation Results
Another bonus about the color choice was that my handy black Ikea shelves now look perfect in the room. :) Oh, and I decided to add another little dandy to the room using the same paint. A little hint: it's not used for CDs anymore...
I hope you like the outcome as much as I do! I highly recommend trying Rustoleum Cabinet Transformations if you have similar furniture or cabinets in your home to update. It's a great product and worth the price in comparison to new furniture or cabinet replacement.
Stay tuned for Part II of Lost in Creative Space! Can you say walls? :) Any guesses on color?
Since today was a "transformation" day, I chose to leave you with one of my favorite verses from Romans on life impacting transformation...
"Do not conform any longer to the pattern of this world, but be transformed by the renewing of your mind. Then you will be able to test what Gods will is-his good, pleasing and perfect will." Romans 12:2
Keeping Him in mind,


If you dont mind me asking, what color glaze did you use?
ReplyDeleteAs noted above, I passed on the glazing step to make less steps! :) I didn't think I needed the glaze on black. but I'm sure it would've looked even better with one! The top coat gives it a matte sheen, which I still like.
ReplyDelete