Let everything you say be good and helpful, so that your words may be encouragement to them. Ephesians 4:29b

Thursday, May 16, 2013

More Than Apples: Teacher Appreciation Week, Westside Style!

Ok, so when I sign up to be in charge of something, I tend to go a little overboard on it. :)  Are any of you this way?   Well, last year I was asked to be on the PTA Board for Westside Elementary, but due to my youngest still in preschool and just letting go of the part-time job, I regretfully declined to avoid filling my plate to keep my focus on the family and home.  As a result, I volunteered myself for PTA Chair position instead...and I would aim high.  I owed them that much, right? :-/ I chose Teacher Appreciation Chair.  I honestly couldn't think of a better position to serve our school, our teachers and our parents, while also getting to enjoy some of my little "passions" along the way! ;)

August came and I hit school supply sales.  I aimed for supplies teachers need at the end of the year:  pencils, erasers, dry erase markers, glue sticks....and I threw in hand sanitizer.  I sacrificed some closet space for the year, but it was worth it to cushion our TA Week budget come May.  Throughout the year, I over-pinned TONS of ideas for Teacher Appreciation Week on Pinterest.  Come spring, after our birthday madness, my PTA Board VP (shout-out to Bethany Benson!) connected on details.  We came up with ideas for daily gifting for that week.  Students (and parents) also participated in the daily themes.  We created/purchased the rest as the week approached.  With Pinterest, a few fresh ideas, Bethany's 110% contribution and the PTA Board's help, this is how it all came together!


Westside Elementary Teacher Appreciation Week
May 10th - 16th, 2013

MONDAY
"Thank You For Quenching Our Thirst For Knowledge"
Students were sent home a "cup card" (see below) to gift their teachers with.  PTA (aka: Bethany & I) provided teachers a "Drink Day" in the Teachers' Lounge, complete with a flagged cup for each teacher. 

My friend Emily had a great idea to put the card in a straw cup, so I copied her and made a last-minute straw cup/jar with card and treats inside as my son's gift. 
PS: Em's cup was definitely cuter than  mine. :)


The adorable "quenching my thirst" theme/graphic came from A Bushel and a Peck blog.


TUESDAY
"We Couldn't Have PICKED Better Teachers"
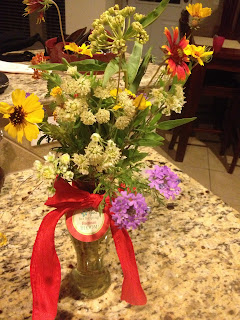
Students "picked" teachers a gift from nature (plants, flowers, fruit, nuts, etc.)  PTA provided teachers a "Fruit Day" in the Teachers' Lounge, with a little thank-you gift for the classroom.  Bethany has a knack at food display!

My son picked wildflowers from our neighborhood preserve for his teacher.


The adorable "Couldn't Have Picked" theme tags come from the Eighteen25 Blog
I tweaked the text a bit for my sign (jpg) and pencil toppers (pdf).
The personalized tag on the flowers comes from the Skip To My Lou Blog.


WEDNESDAY
"Westside Teachers are the Sweetest!"
Students gave teachers their "sweetness" (aka: sweet words, hugs and treats).  PTA provided teachers small storage boxes of candy with the help of  some very helpful Board members! (Thanks, gals!)

I put my son's teacher's favorite sweets (Hot Tamales & chocolate bars) in this little polka-dot bag with one of the extra box tags.


These "sweet teacher" heart printables came from the Tater Tots & Jello Blog.


THURSDAY
"Westside Teachers are Out of This World!"
Students gave  teachers their shining star smiles, "You ROCK's" and high fives.  PTA provided teachers a "Blast-Off Breakfast" of donuts and breakfast casseroles ("thrown together" by Bethany!) in the Teacher's Lounge.

This day wasn't as "gifty," but I decided to send a little something anyway, keeping with the theme.  A quick Silhouette-made stencil, a Sharpie, some burlap, a cute frame and...wa-la! Mrs. R was all smiles. :)


FRIDAY
"Thank You For Your Com-"MITT"-ment to Our Children"
Students made teachers homemade cards of love and thanks.  PTA provided teachers a lunch in the lounge, serving yummy Tex-Mex made by our parents.  Thank-you oven mitts (from Dollar Tree) were stuffed (also by Board members) with the school supplies bought in August!  Teachers loved choosing their mitts among all the colors.
I totally forgot to photograph my son's love card to his teacher!  Oops!

I really enjoyed taking time creating these themes, gifts and decorations, even if it did take a little more time, energy and a few late nights. :) I want to, once again, thank our PTA Board, Bethany Benson and our wonderful parents and students for all their help and participation for our teachers.  Westside Teachers are worth all that effort...and MORE! 
A teacher takes a hand, opens a mind and touches a heart.
"As each has received a gift, use it to serve one another, as good stewards of God's varied grace." 1 Peter 4:10.
Teachers have a God-given gift and they serve our families and community each every single day they get up to teach our children.  God bless you, teachers! 
Keeping Him in mind,


Tuesday, April 30, 2013

Baby "Bogey" Bottoms

So, I just HAD to share my bestie's recent baby sprinkle with you.  Her coworkers decided to throw her a baby boy sprinkle (aka: mini shower for 2nd baby) and since they beat me to it, I offered my help!  The nursery theme is golf, a very easy choice.  Why?  1) Daddy LOVES golf and lived and breathed it (and could've gone pro), and then he met Mommy.  2) Daddy and Mommy met and worked on the golf course!  The beautiful events coordinator and the handsome golf pro fell in love, married on this very day 8 years ago and are now awaiting their 2nd child to arrive! (Happy Anniversary, Leah & Jeff!)  This will be Lil' Bro to precious Big Sister Hannah, 2, who was celebrated just over 2 years ago with "A Little Birdie Told Me.." baby shower, as some of you may recall. :) BBB (Baby Boy Bottoms), not yet named, is due May 18th, but there's no way he'll make it that long.  He looks ready! :)

The little celebration was held at a nearby country club, sister club to Mommy's club. :)  Needless to say, the party decor was theirs for the keeping! I figure they can use it a few more times. ;)


Here are some photo collages I created of the fun and decor...

Leah's coworkers provided food, cake, table signs, wreath and mantle "Baby B(squared)"...and the golf ball and tee idea!  I provided help making the golf tee successful, baby wishes cards, a banner, candy mix favor bags and a diaper cake..of course! ;)


Yeah, this was definitely my favorite part!  So easy being a diaper cake guru!  The sad part is that I had never seen one of these until I was searching Pinterest for golf baby shower ideas! Crazy, right?


Leah got lots of cute boy duds for BBB (Baby Boy Bottoms). Plaid was quite popular, of course!  Miss Hannah was Mommy's Big Helper, too!


It is always a blessing to bless the Bottoms Family!  They are a wonderful, godly family who know and firmly believe that this baby is a perfect gift from their Heavenly Father, and are committed to raise their children to know the love of Christ.  This boy will be beyond blessed!

"Every good and perfect gift is from above, coming down from the Father of the heavenly lights, who does not change..." James 1:17  

Thanks for visiting!
Keeping Him in mind,


Sunday, April 14, 2013

Insta-Coasters!

Does anyone print their photos at Walgreens?  I do!  It's the closest spot to my home get some quick prints when I need something fast.  Well, recently a friend of mine, Mrs. Gentry (who happens to have an awesome blog) retweeted that...


...at WALGREENS!!


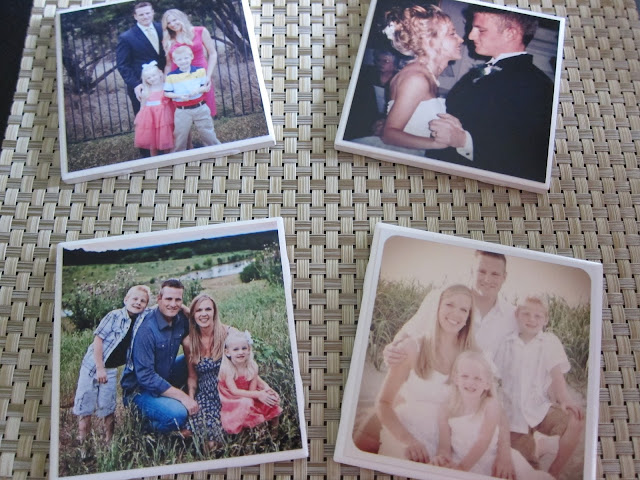
This got me very excited.  I LOVE Instagram photos!!  I so enjoy editing my phone shots with Instagram, making fun, memorable shots, many of which are frame-worthy!  And after making these little goodies for two couples-to-be-wed recently, I was doubly excited! VERY easy...


I was so pleased that I planned to make some for my coffee table with the extra tiles.  That is, until I got the Walgreens news.  My plans got changed.  Did you know Instagram prints are 4x4" in size? :)  I'd like to share my most recent DIY project, step-by-step!  I call them...

Insta-Coasters!

Step 1: Print Your Instagram Photos at Walgreens
Download the Walgreens Mobile App, select and send your best Instagram shots 
to be printed at your nearby Walgreens!  The 4x4's were ~0.40/print.
You will have to create an account if you haven't printed via Walgreens before.

These were my trial shots.  They came out great with a matte (not glossy) finish!


Step 2:  Grab these inexpensive supplies!


White ceramic bathroom tiles (.13ea at Home Depot!
Mod Podge (~$5+ at craft store, depending on size)
Foam brush (.77 at HD)
Adhesive felt pads ($3 for pkg of 75 at HD)
(^ or cut felt + hot glue)

These supplies would cost be no more than ~$9.50 (excluding prints), 
but I keep MP, hot glue, felt and brushes on hand.

Step 3:  Apply felt pads to base of coasters.
I put the pads on first to raise the coasters up for brushing/spraying.
These are white 3/8" pads.  To save a couple of bucks, cut felt and adhere with hot glue.


Step 4:  Use foam brush to apply a thin layer of Mod Podge to the tile.
Make sure to brush to the edges! Rinse & squeeze dry brush when done.


Step 5:  Place photo on tile and use a soft cloth to flatten and smooth out air bubbles.
I used my phone screen protector cleaning cloth. Using your hands will leave fingerprints.


Step 6:  Let Mod Podge'd photo dry 15-20 minutes.
I dried 30 minutes. Don't they already look fun?


Step 7:  Apply layers of Mod Podge to coasters all the way to the edges. 
Allow each layer to dry at least 30 minutes to an hour.
These layers can be more generous than the naked coaster layer.
I did 4 layers because I had the time. :) Rinse/dry brush between layers.


Step 8:  Waterproof with acrylic spray. Follow spray directions on container.
I sprayed mine inside a cardboard box in my garage (or try outside to avoid fumes) and let dry overnight.  A good, open-air dry time helps rid them of fume odor from the spray.


Step 9:  Dry at least 24 hours. 

DONE!

So, what do you think?


I LOVE THEM!!  

I hope you enjoy making your own!  They are also great gift ideas for family and friends.
If you make them, I would love to know they turn out.  I'd also love to know if anyone has any issues with them, and I'll do the same for you!   I only made them a week ago.  So far I only see a slight bubble in one, so be sure that first layer under the photo enough and the photo is pressed down well.  I tried to follow similar DIY coaster methods, but none of them used photographs.  Hopefully they stay durable with the waterproofing spray!

Thanks for stopping by and as always, I'd like to leave you with some encouraging words from Paul on an "attitude of mind" like Christ.

May the God who gives endurance and encouragement give you the same attitude of mind toward each other that Christ Jesus had, so that with one mind and one voice you may glorify the God and father of our Lord Jesus Christ.  Romans 15:5-6

Keeping Him in Mind,

Thursday, March 28, 2013

Beta Etsy-ing...

Howdy everyone!

Just a quick post to say that I'm trying out some of my party printables on Etsy.  I like to call it "Beta Etsy-ing" for fun. :)  If you know of anyone interested in Ninjas, send 'em my way because the Ninjago Eyes and Teenage Mutant Ninja Turtle Masks are going cheap! LOL


I know I need more in the shop, but hey, it's a start. ;-)  I'm pretty clueless, so praying God shows me something, regardless.  If I can work on a more thorough plan, I'd love to set up a Kingdom business.  I'd love others' input and suggestions along the way! Thanks for your love and support.

http://www.etsy.com/shop/ClearlyCandace

Much love to you and yours.
May your Easter be blessed as we celebrate the Risen King!

Keeping Him in mind,

Tuesday, March 19, 2013

A Fin-tastic Shell-abration!

It's that time of year again!  Surprisingly, I was able to pull off, yet another double birthday party for my two favorite kiddos!  This year's party was inspired by my very favorite birthday party as a kid.  My parents booked a room at the local Holiday Inn so that I could have a pool party in their indoor swimming pool!  This January baby with a swimming obsession will never forget that fun day, nor my cake: a teddy bear wearing a red and white polka-dot bikini. I wish I had a photo to share! :)

Because of that swimming celebration, I decided to book the kids' party at Emler Swim School nearby.  My son requested a Teenage Mutant Ninja Turtles (TMNT) theme early on.  Much of January, my daughter was obsessively singing with her Little Mermaid CD, so Ariel was an easy choice. :) Yep, another double-themed double birthday party.  With my girl going into Kindergarten next year, I suspect a double party next year might be iffy with many more friends to choose from.  If not, I'd say four years in a row with a double party for a boy and a girl wasn't half bad. Bring on the madness of individual parties! (Did I just say that?)

Invitations
I decided to make things quick and easy this year with a photo card for invitations.  These days it seems pretty "old school" make invitations with the convenience of Evite, but I figured this one wouldn't hurt. ;) I found the backgrounds via Google Images and came up with these.


Food
I decided not to do as much in the way of food this year, since we would be serving pizza for dinner due to the only available party time being 5:30.  I kept things easy...

- Pizza delivered for all (the Turtles' favorite food!)
- TMNT cupcakes
- Mermaid cupcakes
- Fishbowl votives of Rainbow Goldfish and blue Jell-O of 'swimming' Swedish Fish
- "Ocean Water Punch" (Blue Rasberry Mio flavored/colored water)
- Fruit tray
- Veggie tray
- Bottled water

Surprisingly, I did not find the TMNT cupcake idea on Pinterest (yet).  I found a TMNT Strawberries how-to video while surfing Google.  Dipping strawberries in green candy melts makes a great head for a turtle!  I added cut Airheads and Wilton candy eyeballs and....wa-la!  Ok, so they kind of freak me out.  They remind me of Umi, that hand character with eyeballs. LOL! Even so, they were TOO yummy!

  
I did find the mermaid cupcake idea on Pinterest.  I decided on sugar cookies rather than white chocolate as mermaid fins, so they didn't turn out quite as cute as the Pinterest ones.  However, they were still a hit at the party, and quite tasty!  I made a fin-shaped cookie cutter out of a coke can (no joke!) and made cookie fins with green sprinkles.  I frosted strawberry cupcakes with light blue frosting swirled with some dark blue icing and blue sprinkles for an "ocean" look.  I stuck in the fins to create a "diving" mermaid. The left is my "too-large" 1st batch of fins, and the right is my 2nd batch of smaller fins after re-sizing my cutter a bit.  Not perfect, but still kinda cute, right? 


Decor
For party decor, I used the following:

TMNT Decor:
- Cardstock TMNT characters for the wall
- Lime green tablecloths, plates and napkins for food and party tables (Walmart)
- Fabric masks (Party City, $1ea.) cut to a thinner shape, with an "angry-eyes" look :)

Ariel Decor:
- Cardstock Ariel and bubbles for the wall
- Ariel party plates, napkins and table confetti (Party City)
- Mardi Gras crowns (Dollar Tree) & an Ariel crown for the party girl (Party City)


Fun!
The kids had an absolute BLAST!  Kids here aren't swimming in March, unless they are taking lessons, so it was a real treat for all of them. I think all the action gave them a big appetite because that pizza and cake went down fast!


Party Favors
Both sets of favors were pretty fun this year.  The TMNT bags were made from green sacks rounded at the top, and I added masks created on my Silhouette.  I also made a sticker on the back of the bag shown below on the thank-you cards.  Each sack included:

- Foam nun-chucks (Dollar Tree)
- TMNT sticker (ebay)
- Airhead candy, mini size (Dollar Tree) 
- "Mutagen Ooze" (Dollar Tree, divided into thirds, bagged & labeled w/sticker)

UPDATE:  Interested in these masked favor sacks? Get your own favor sack printables from the ClearlyCandace Etsy shop!  They are sized to fit standard party/lunch sacks and you can opt for PDF (B&W & color) or an editable Silhouette Studio file!  Get them here:  https://www.etsy.com/listing/127840680/teenage-mutant-ninja-turtles-masks-for  


The Ariel favors were also fun.  My daughter and I made soaps with glycerin from the craft store, which were quite fun and easy! We included party confetti and an Ariel tattoo. It made for great mother-daughter bonding time. :)  I made tags using my Silhouette using an image I found via Google Images. The favor bags included:
- Homemade Ariel glycerin soap
- Ariel Magic Washcloth (Dollar Tree) or fish squirt toy (for toddlers, 3/$1 Dollar Tree)
- Ring Pop (pkg of 4, Dollar Tree)
- Mini loofah (pkg of 6, Dollar Tree)


UPDATE:  You can now get your own non-personalized version of these Ariel party favor tags from the ClearlyCandace Etsy Shop! 

Thank-You Cards
This year, my first grader was able to write his thank-you cards for the very first time!  I should've taken a photo of each one because I just love how he writes and spells at this age! :)  I wrote quoted thank-you messages by my girl and let her sign her name.  She also added a heart. <3  I created, printed and cut  TMNT stickers (also on back of favor sacks) and Ariel stickers using my Silhouette.  I put them at the top of 4.5x6.5 cardstock (multi-color pack from Michael's) giving ample space for the message. Please ignore my terrible handwriting!


UPDATE:  Like the TMNT and Ariel stickers?  Get them all on Etsy, as well! http://www.etsy.com/shop/ClearlyCandace  

I have a feeling this will be a party they will never forget, just like mine way back when. :) Whatever the party place, kind of cake or crazy theme, my husband and I truly enjoy showing our children love through the celebration of their births each year.  Our desire is for them is to feel "dearly loved" as Ephesian 5:1 says and to always know where that love comes from - Our Lord and Savior!

"Follow God's example, therefore, as dearly loved children and walk in the way of love, just as Christ loved us and gave himself up for us..." Ephesians 5:1a

Thanks so much for visiting!

Keeping Him in Mind,

Wednesday, January 23, 2013

Fluff it. Frame it. Flower it.

Three easy creations using your leftover "Fab-Fabric!"

Howdy!  It's good to be back!  I hope you all had a wonderful Christmas, New Year's and are staying warm this winter season.  Our weather in Central Texas is wonderful this week, but I won't dwell on how wonderful because I know there are many out there cooped due to the very cold weather!  On a more positive note, this post might be a great solution to bide a little time indoors this season. :)

Anyone have boxes or bins of extra fabric around the house?  I don't have a ton, since I'm not much of a seamstress, but I definitely have a little!  I sometimes hit the clearance remnants at JoAnn's, Hobby Lobby or Hancock's and come home with pieces of really cute fabric!  I just can't pass them up and hope to make something fun out of them.  Then they usually sit and sit in a bin.  Well, I finally got around to making something one of my fabrics!  THREE somethings, actually. :) I found this cute outdoor fabric from Hancock's.  I paid $5 for about a yard of it (a steal when it costs $15/yard or more for this stuff).  It may look familiar to some of you. :)  I'll give you a hint:  It's in my Creative Space series.  (If you missed it, you might find some ideas for a space of your own! :)  


I like to call this my "Fab-Fabric!"  It makes me smile. :) See?


Fluff It.
Anyone recall this photo? Yep, it's my upcycled chair! Notice the adorable pillow?


Well, it's a FAKE!  Yep, I'm coming clean.  I really wanted a cute pillow using my fabric for my chair in time for my blog post months back.  I had the fabric, but I hadn't made the pillow.  SO...I made a quick decision and wrapped the fabric around my daughter's doll pillow and taped it in back with masking tape. LOL! Hey, it did the job, right?  Well, here it is, 2013 and I'm ready to get REAL... 

I found this "LOVE-ly" little fleecy pillow on clearance ($3.50!) at Ross.  A much better size and shape pillow for my chair. Score!


Now to cover it.  I searched and found what seems to be the most popular way to recover a pillow: an envelope pillow cover!  You can make and replace them whenever you want a change - Brilliant!  The Decorated House blog has a great little tutorial that highlights Mary Dobson's Five-Minute Cushion method. There's no way it's 5 minutes, but it's definitely the fastest pillow cover I've ever made!  If you have a sewing machine, it's definitely quick.  It just requires two hemmed edges and then two pillow sides stitched since the fabric wraps around with an envelope opening in the back.  This is soooo much smarter than stitching 4 sides and 2 separate pieces!  It's also very easy for those those non-seamstresses like me.  Hand stitching and Stitch Witchery will probably work, too, but a machine will save many more minutes!  :)  So, what do you think?


My chair is now complete with a new pillow with a real sewn cover!


I heart this.


Frame It.
After my pillow-making, I had more Fab-Fabric that I wanted to add somewhere else in the room.  I had found some old white frames in a closet and the light bulb came on: "I'll FRAME IT!" :) I removed the glass and got to work with my scissors and Tacky Spray.  I spray-glued the fabric to frame insert and trimmed the edges.  I also had a cheap ($1), flat metal cross on hand that I'd picked from a craft store one day.  After a 10-second black spray paint session + a little dry time, I created this using more Tacky Spray. You like?


It took me a whole five minutes to make!  It cost me $1 (cross) since I had all the needs on hand.  I'm very pleased with my second flash of Fab-Fabric in the room on my hutch!  Even more I especially love that it represents my Lord and Savior!


Flower It.
I happened to be browsing Pinterest the same day I'd framed the fabric and came across the cutest thing!  I saw these cute flowers made of a similar grade of fabric, so I just HAD to make one! It would be a perfect and easy embellishment using my last strip of Fab-Fabric.   


These were made by Emily of Jones Design Company.  Her simple tutorial and free printables convinced me. :)  I found a white button in my sewing box and got to work!  


A little cutting, a little needle and threading, a little hot glue, and......DONE!
This one was REALLY easy. I did it while watching some Netflix! :)
$0 to make this one.


It's the perfect 3rd and final pop of my Fab-Fabric in the room for my bright pink IKEA lampshade.


Guess what?  I'm out of Fab-Fabric!  It's bittersweet.  I now have a little more room in my fabric bin.  Having glue, spray paint, an old frame, a needle & thread, and a button meant I spent $9.50 total.  A stocked creative space comes in handy. ;)  I hope you enjoyed these three little creations and maybe got inspired to do one (or more) of them.  I promise you can do it.  I am all about EASY DIY, so if I can make it, anyone can.  

In the spirit of creations, may we all be reminded that we are God's creations, made for a purpose.
"For we are God's workmanship  created in Christ Jesus to do good works, which God prepared in advance for us to do." - Ephesians 2:10  
Thank you, Lord, for creating me in Christ. Help me to do your good works to the fullest! 

Keeping Him in Mind,