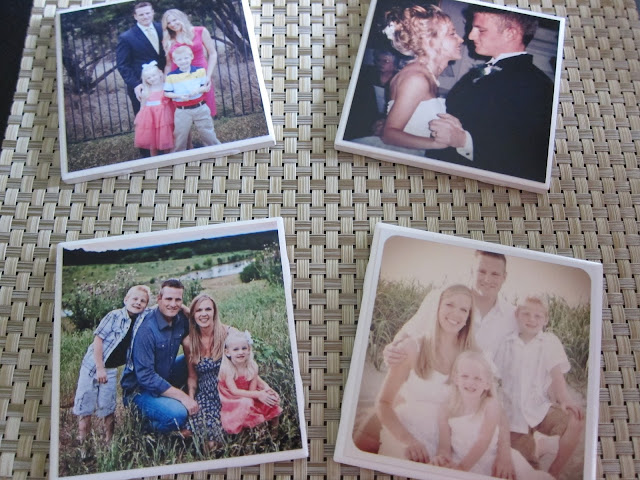
Does anyone print their photos at Walgreens? I do! It's the closest spot to my home get some quick prints when I need something fast. Well, recently a friend of mine,
Mrs. Gentry (who happens to have an awesome blog) retweeted that...
This got me very excited. I LOVE Instagram photos!! I so enjoy editing my phone shots with Instagram, making fun, memorable shots, many of which are frame-worthy! And after making these little goodies for two couples-to-be-wed recently, I was doubly excited! VERY easy...
I was so pleased that I planned to make some for my coffee table with the extra tiles. That is, until I got the Walgreens news. My plans got changed. Did you know Instagram prints are 4x4" in size? :) I'd like to share my most recent DIY project, step-by-step! I call them...
Insta-Coasters!
Step 1: Print Your Instagram Photos at Walgreens
to be printed at your nearby Walgreens! The 4x4's were ~0.40/print.
You will have to create an account if you haven't printed via Walgreens before.
These were my trial shots. They came out great with a matte (not glossy) finish!
Step 2: Grab these inexpensive supplies!
White ceramic bathroom tiles (.13ea at Home Depot!
Mod Podge (~$5+ at craft store, depending on size)
Foam brush (.77 at HD)
Adhesive felt pads ($3 for pkg of 75 at HD)
(^ or cut felt + hot glue)
These supplies would cost be no more than ~$9.50 (excluding prints),
but I keep MP, hot glue, felt and brushes on hand.
Step 3: Apply felt pads to base of coasters.
I put the pads on first to raise the coasters up for brushing/spraying.
These are white 3/8" pads. To save a couple of bucks, cut felt and adhere with hot glue.
Step 4: Use foam brush to apply a thin layer of Mod Podge to the tile.
Make sure to brush to the edges! Rinse & squeeze dry brush when done.
Step 5: Place photo on tile and use a soft cloth to flatten and smooth out air bubbles.
I used my phone screen protector cleaning cloth. Using your hands will leave fingerprints.
Step 6: Let Mod Podge'd photo dry 15-20 minutes.
I dried 30 minutes. Don't they already look fun?
Step 7: Apply layers of Mod Podge to coasters all the way to the edges.
Allow each layer to dry at least 30 minutes to an hour.
These layers can be more generous than the naked coaster layer.
I did 4 layers because I had the time. :) Rinse/dry brush between layers.
Step 8: Waterproof with acrylic spray. Follow spray directions on container.
I sprayed mine inside a cardboard box in my garage (or try outside to avoid fumes) and let dry overnight. A good, open-air dry time helps rid them of fume odor from the spray.
Step 9: Dry at least 24 hours.
DONE!
So, what do you think?
I LOVE THEM!!
I hope you enjoy making your own! They are also great gift ideas for family and friends.
If you make them, I would love to know they turn out. I'd also love to know if anyone has any issues with them, and I'll do the same for you! I only made them a week ago. So far I only see a slight bubble in one, so be sure that first layer under the photo enough and the photo is pressed down well. I tried to follow similar DIY coaster methods, but none of them used photographs. Hopefully they stay durable with the waterproofing spray!
Thanks for stopping by and as always, I'd like to leave you with some encouraging words from Paul on an "attitude of mind" like Christ.
May the God who gives endurance and encouragement give you the same attitude of mind toward each other that Christ Jesus had, so that with one mind and one voice you may glorify the God and father of our Lord Jesus Christ. Romans 15:5-6
Keeping Him in Mind,


